Quick Start with App My Community!
Summary
How to navigate the Admin Console in App My Community and perform basic management tasks efficiently. It is designed to help team members understand the layout, access key tools, and make common updates with confidence.
Applies to: All apps
Where it shows: Each individual app has their own Admin Console to manage the features of the app.
Quick answer
| Image | Location | Where It Shows |
| Blue "Home" Box | Upper Left | Always takes you to the Admin Console Homescreen |
| 'Phone Icon" | Upper Left | Opens the "Web-App" (URL Version of the app) in a new tab |
Help or "?" | Left & Bottom Right | Help Articles, Videos & How-To's |
Click To Watch it Here
Key Steps
1. Identify the Main Navigation Areas 0:14
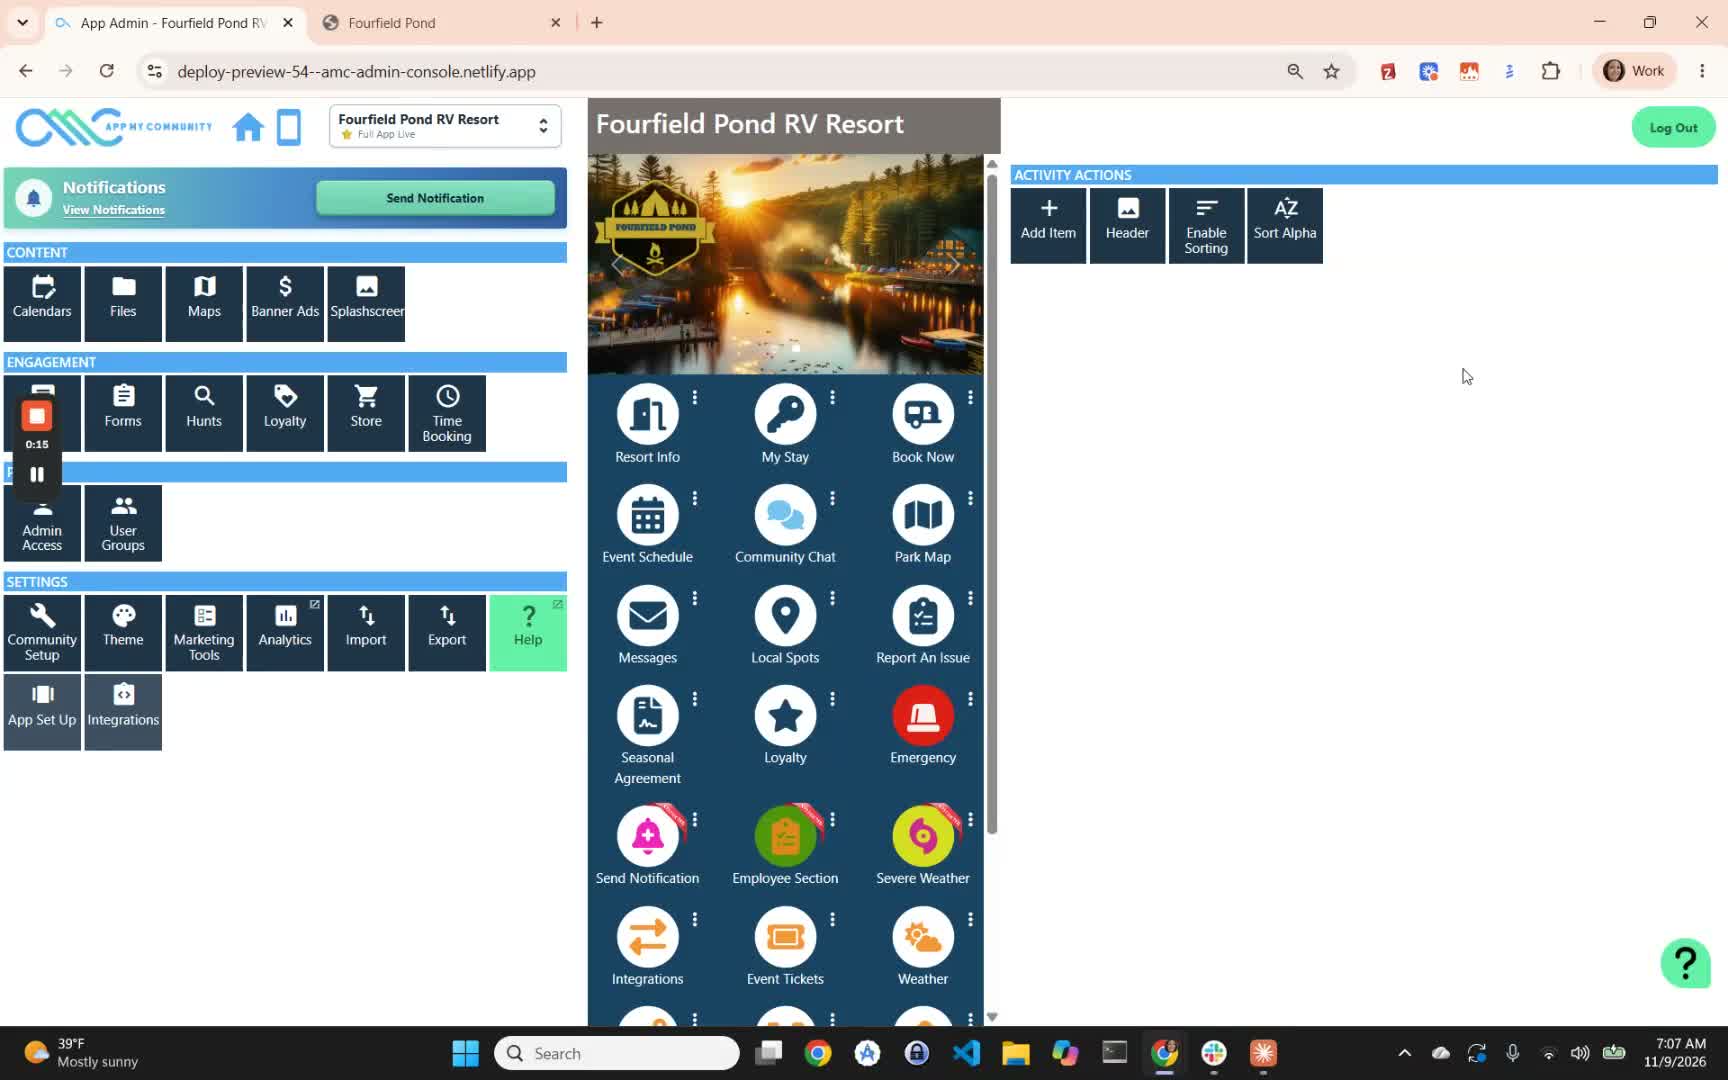
Use the left-hand sidebar as your primary navigation area.
Click the blue house icon at any time to return to the home screen.
Familiarize yourself with the main sections so you can move around the Admin Console quickly.
2. Access the Web App Preview 0:28
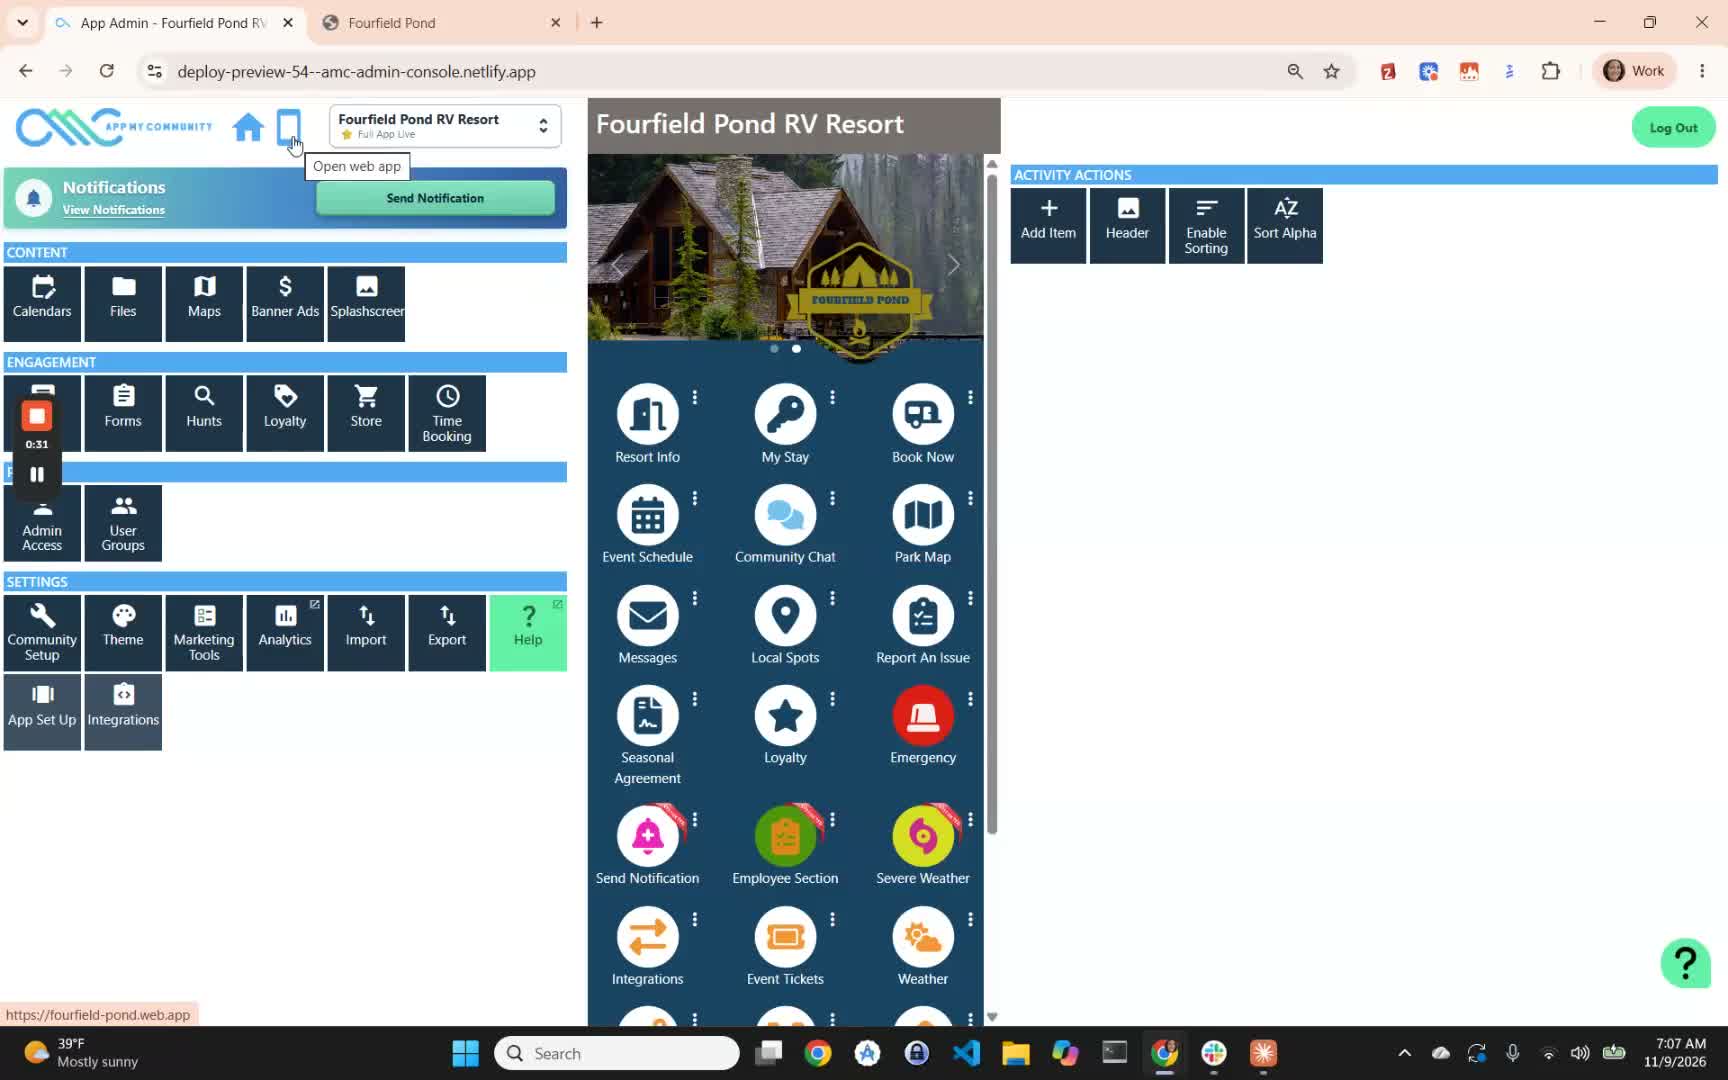
Click the phone icon to open your web app preview.
Use this view to see how changes appear live without needing to check directly on a mobile device.
Review updates here before finalizing them in the Admin Console.
3. Understand the Content and Engagement Sections 0:38
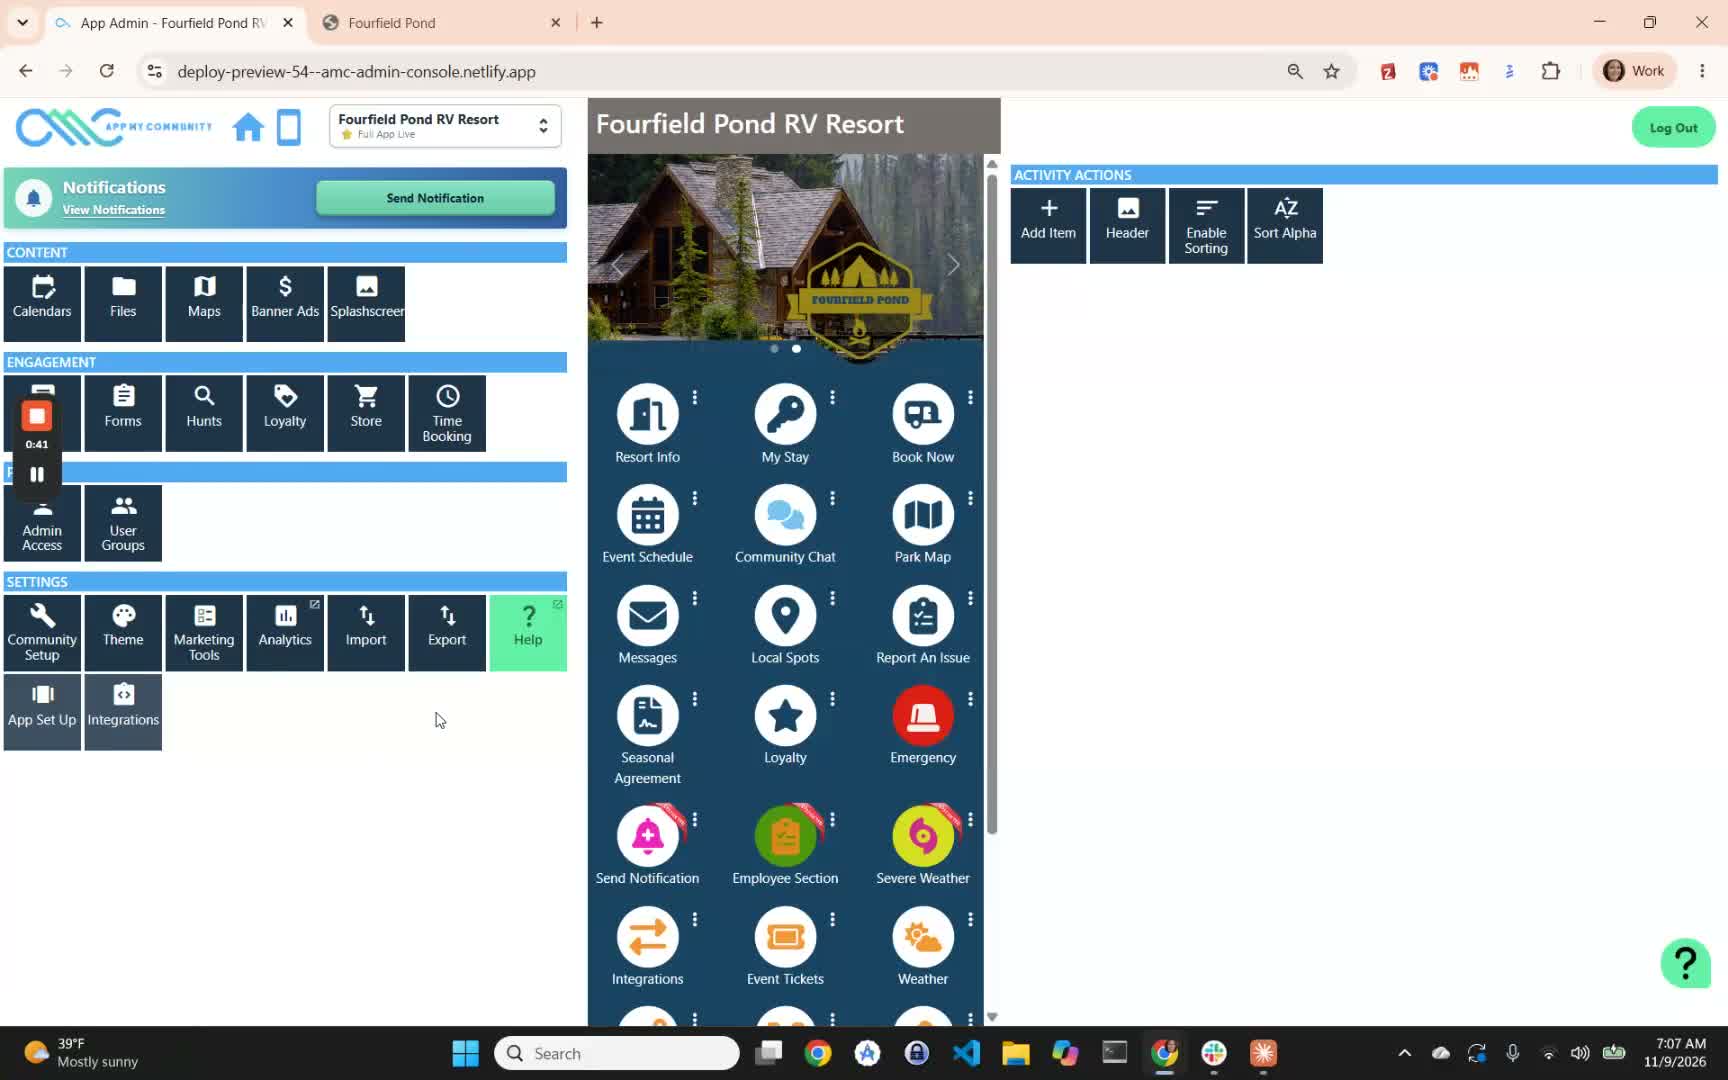
Review the Content area for items such as:
Documents
Calendars
Other informational content
Review the Engagement area for user interaction tools such as:
Custom forms
Scavenger hunts
Use these sections to manage what users see and how they interact with the app.
4. Manage Admins, User Groups, and Settings 0:52
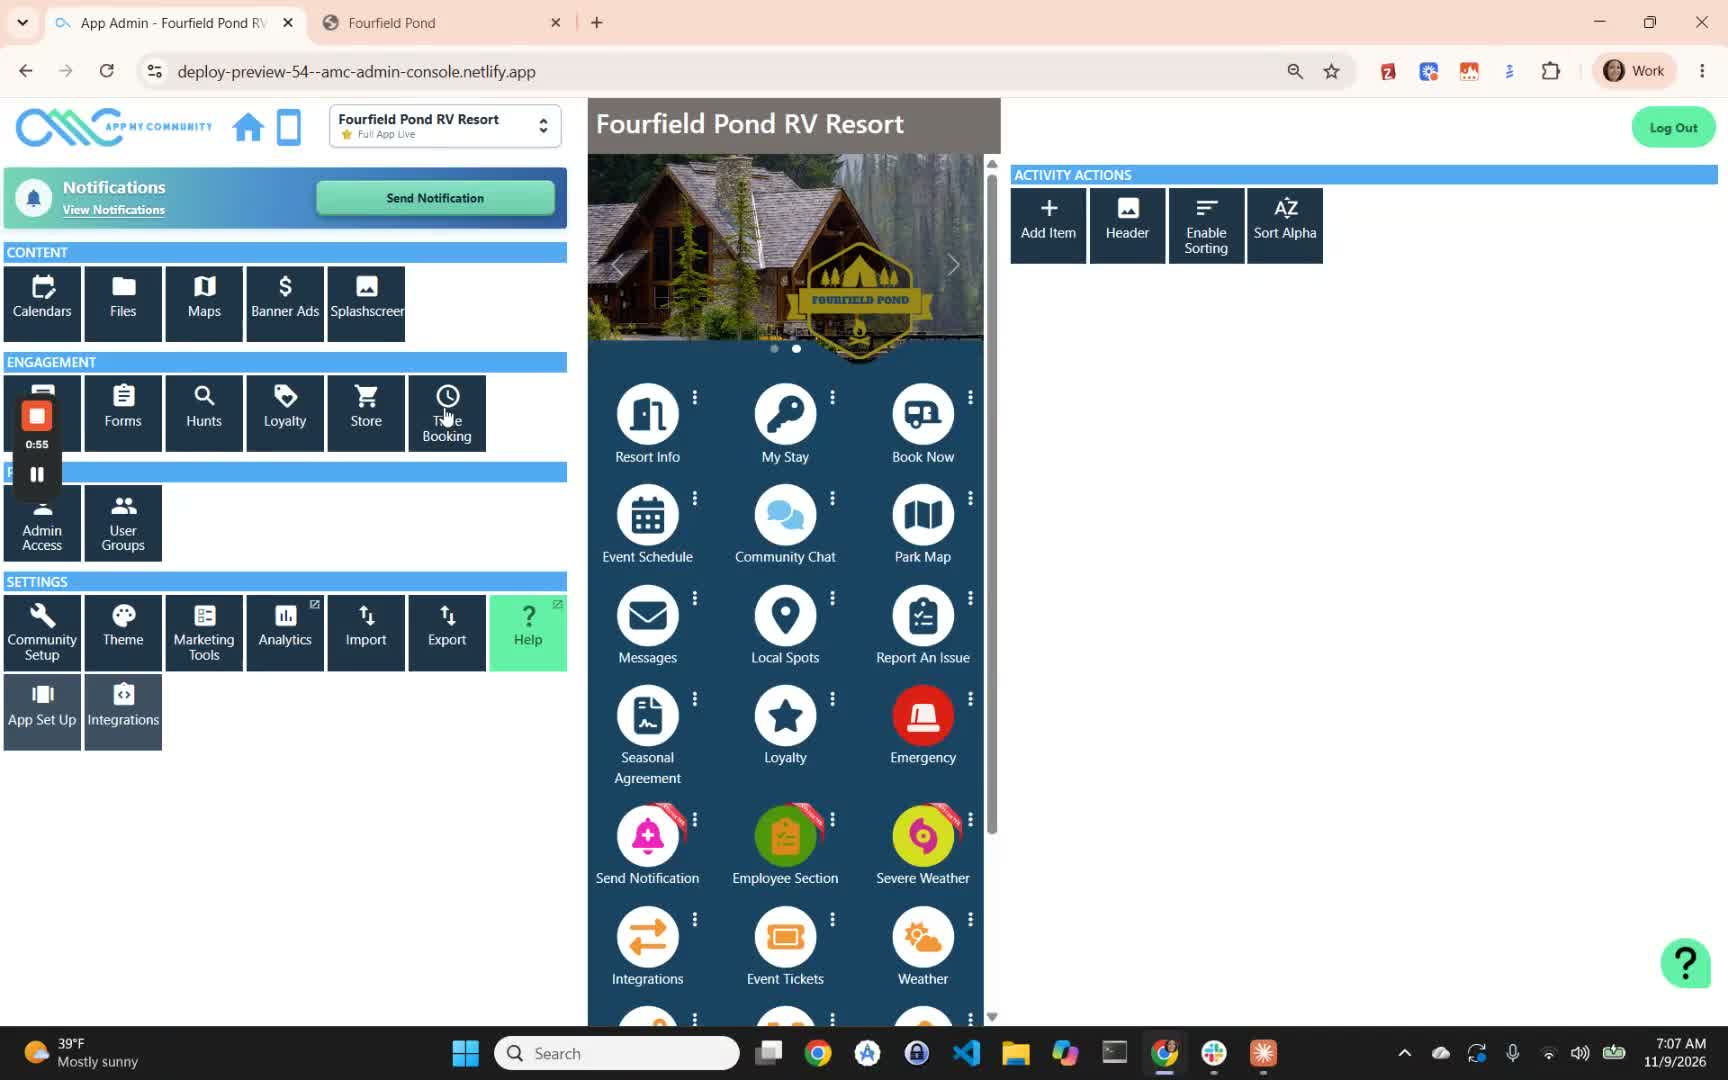
Use the Admins area to manage admin access.
If user groups are enabled, use the available controls to manage those groups.
Check the Settings section for options available based on your permission level.
Only the buttons and tools allowed by your privileges will appear here.
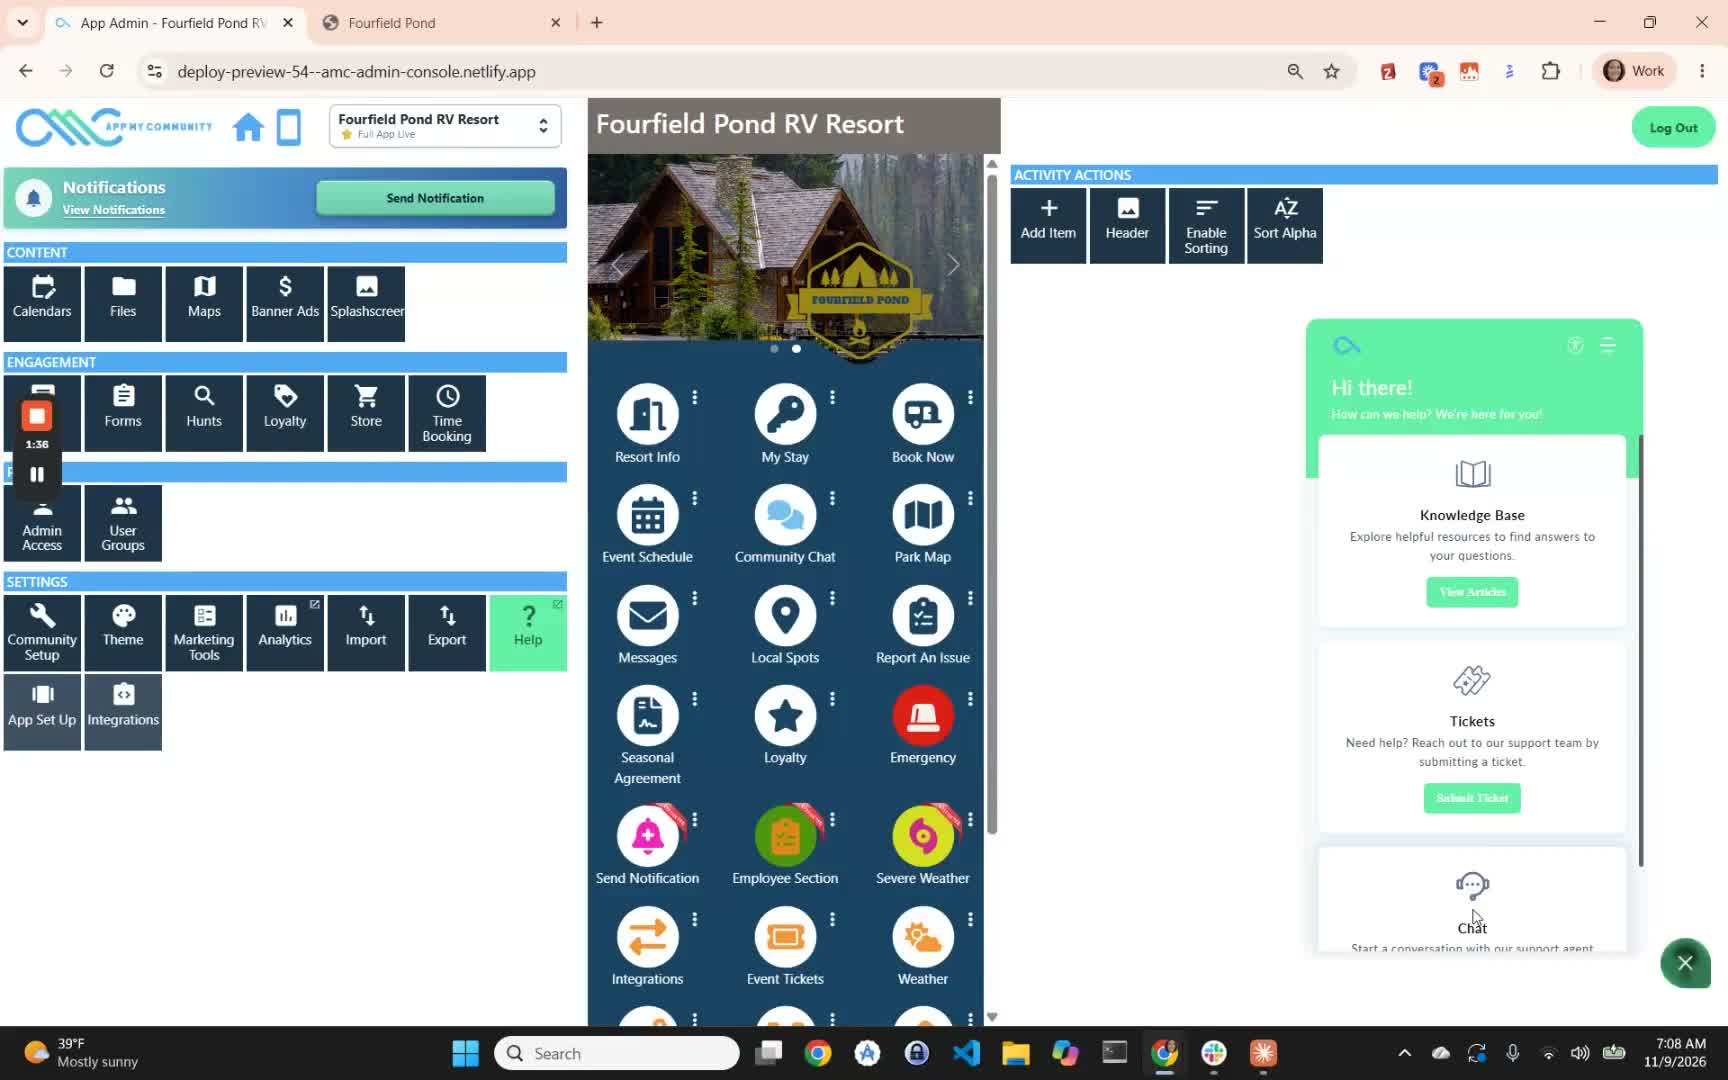
5. Use Help Resources When Needed 1:09
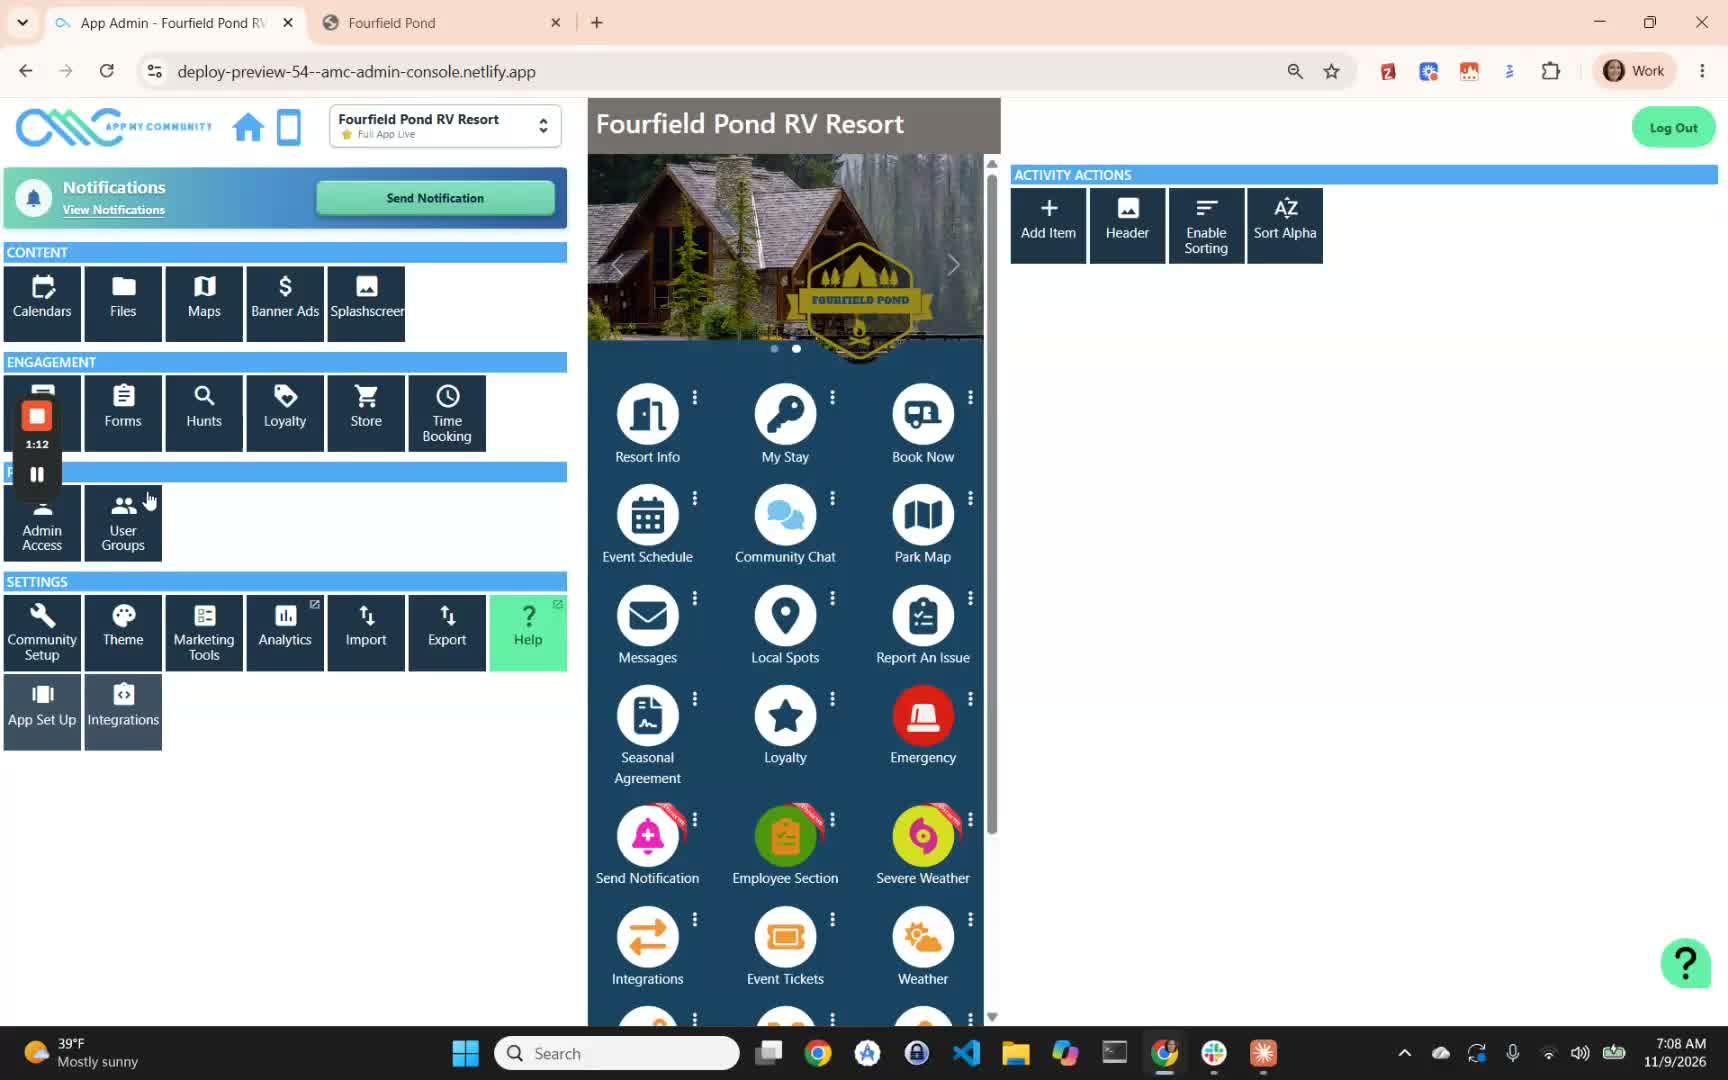
Click the Help button to open the knowledge base.
Use the question mark icon in the bottom-right corner for support options.
From there, you can:
Read help articles
Submit a support ticket
Chat with the support team
Use these resources whenever you need clarification or troubleshooting assistance.
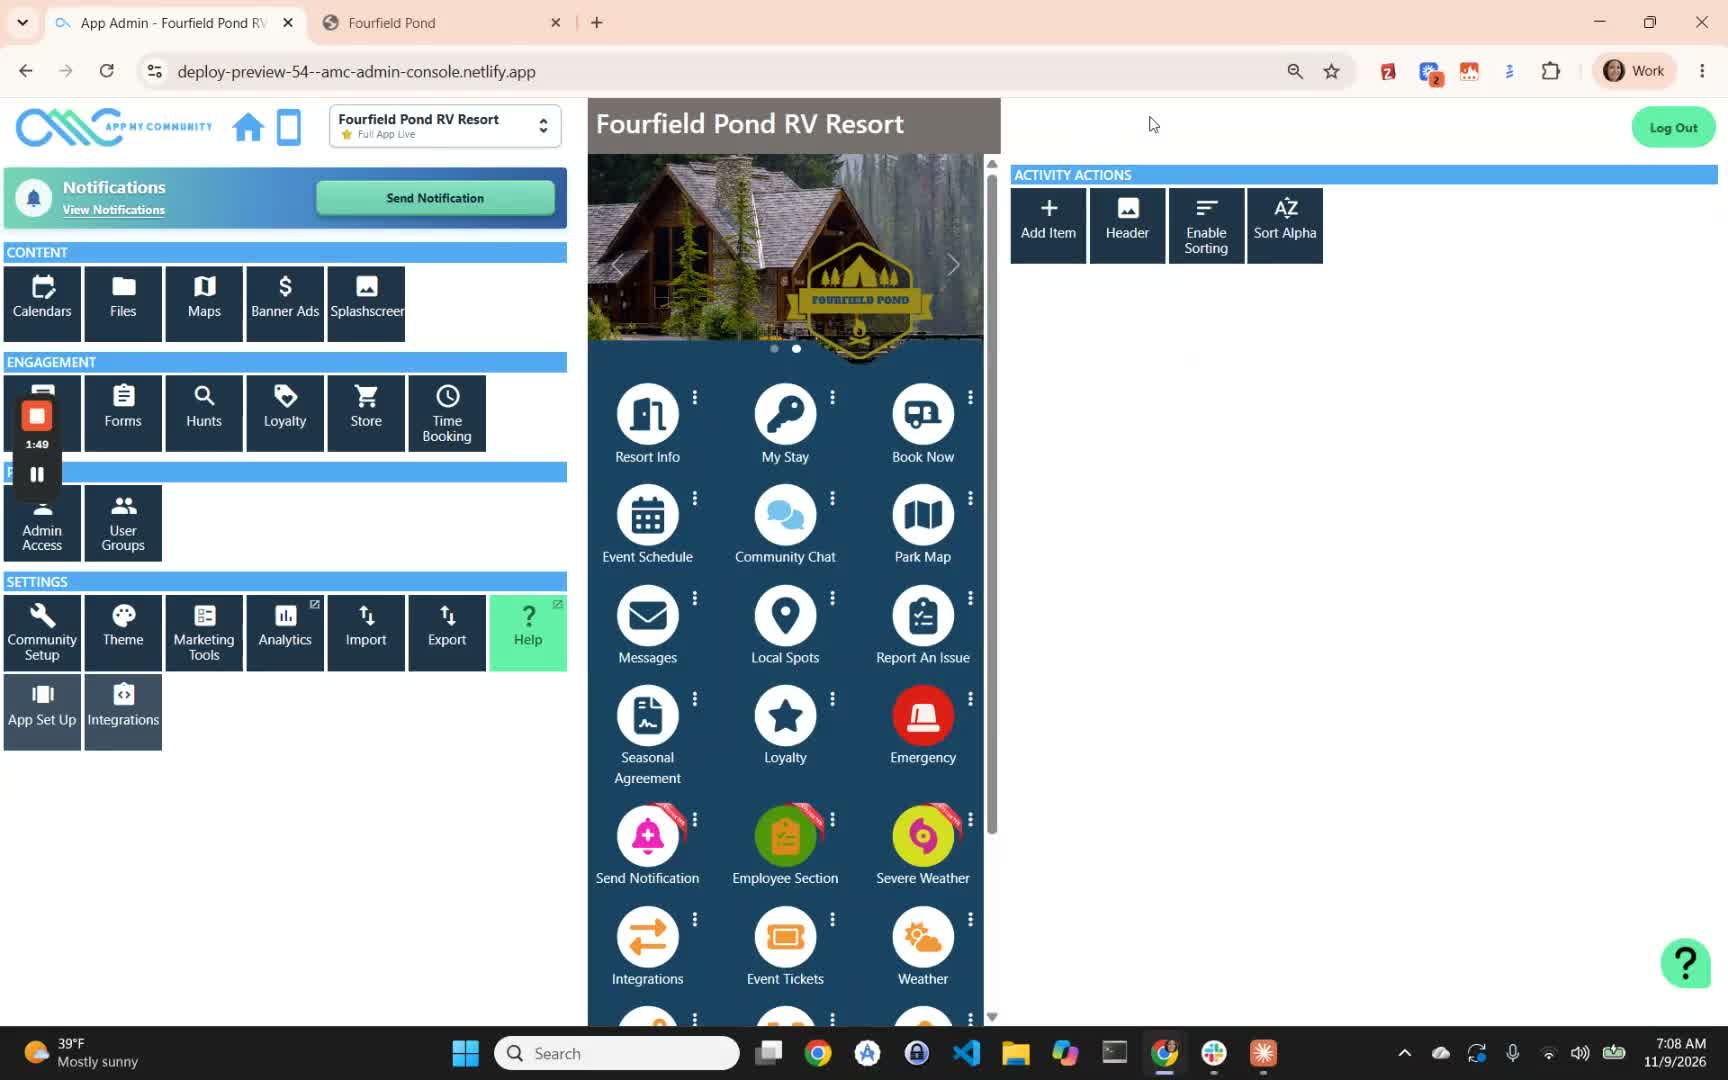
6. Review the App Preview in the Center Panel 1:28
Look at the center panel to see a preview of the app layout.
Use this preview to confirm how images, icons, and other elements appear to users.
Check rotating images and icon placement to verify the app’s visual structure.
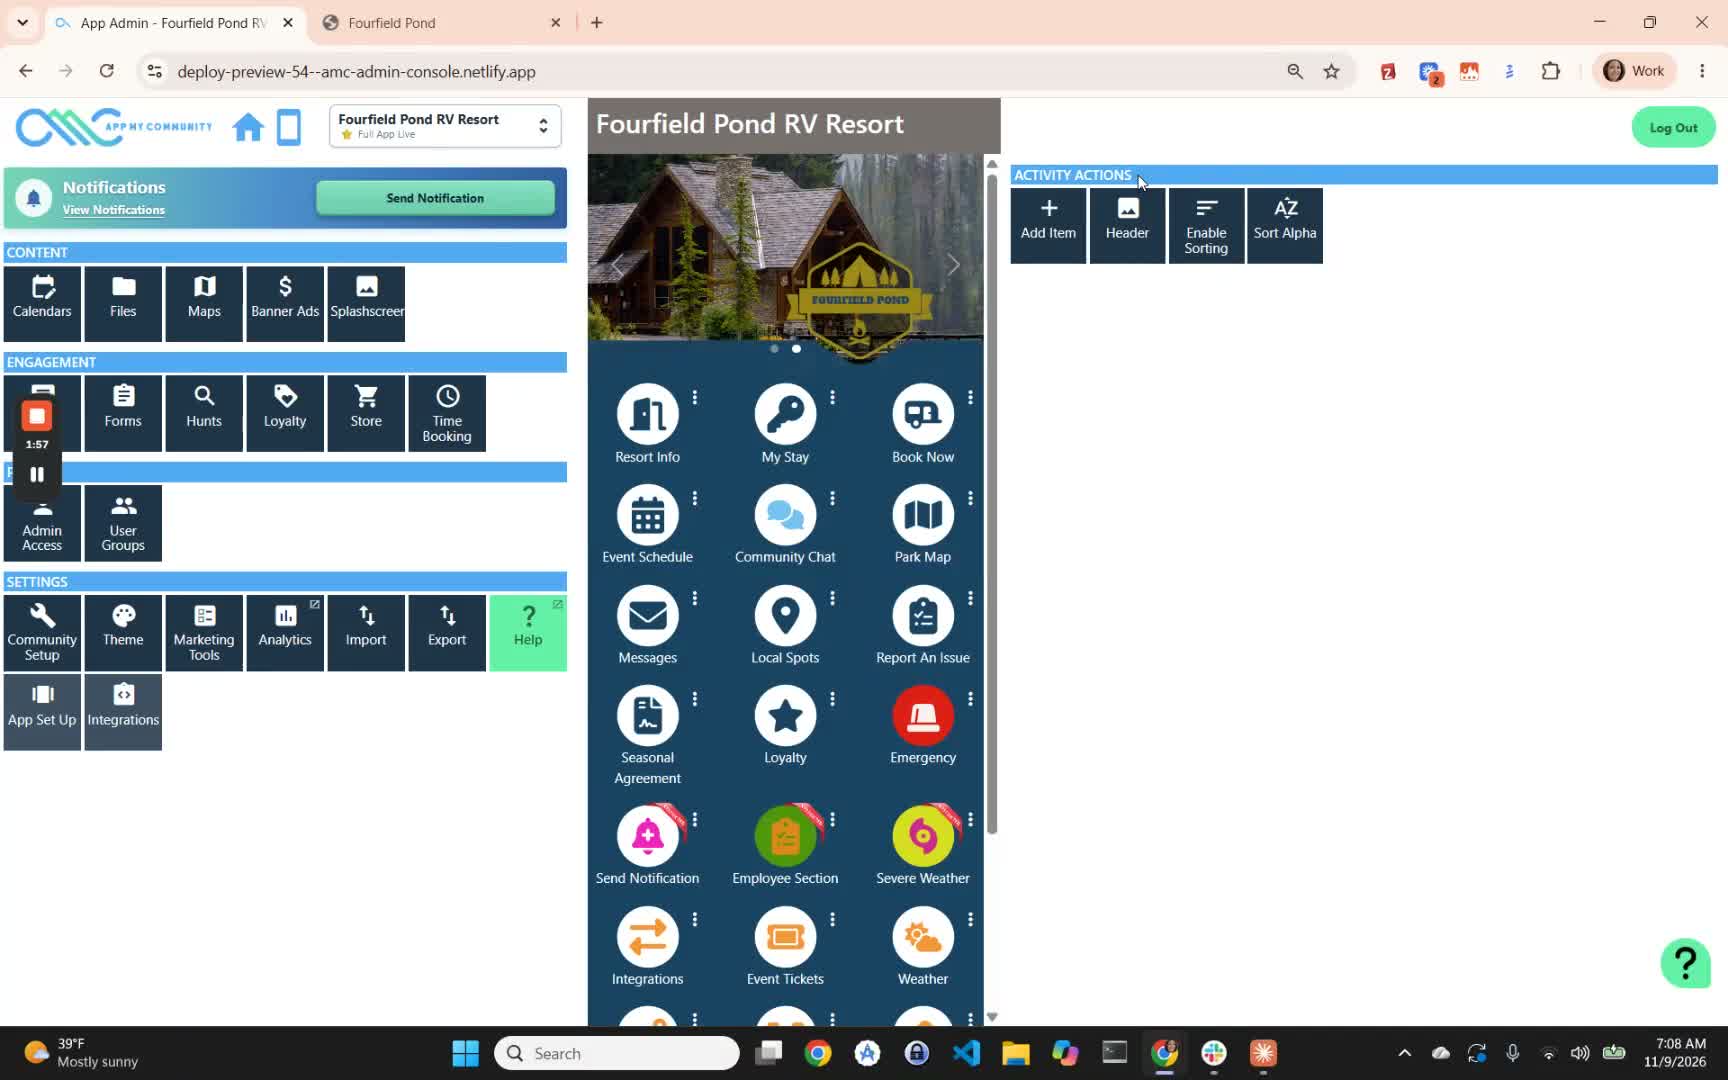
7. Use the Right-Hand Panel for Next Steps 1:40
Refer to the right-hand side for context-sensitive next steps.
The options shown here will change depending on what section or item you select.
Use this panel to continue editing or configuring the selected area.
8. Edit Header Images and Add New Items 1:48
Select Resort Info or the relevant section you want to edit.
Update the header images as needed.
Click Add Item to create new icons or entries.
Confirm the changes are saved before moving on.
9. Reorder Items Manually 1:56
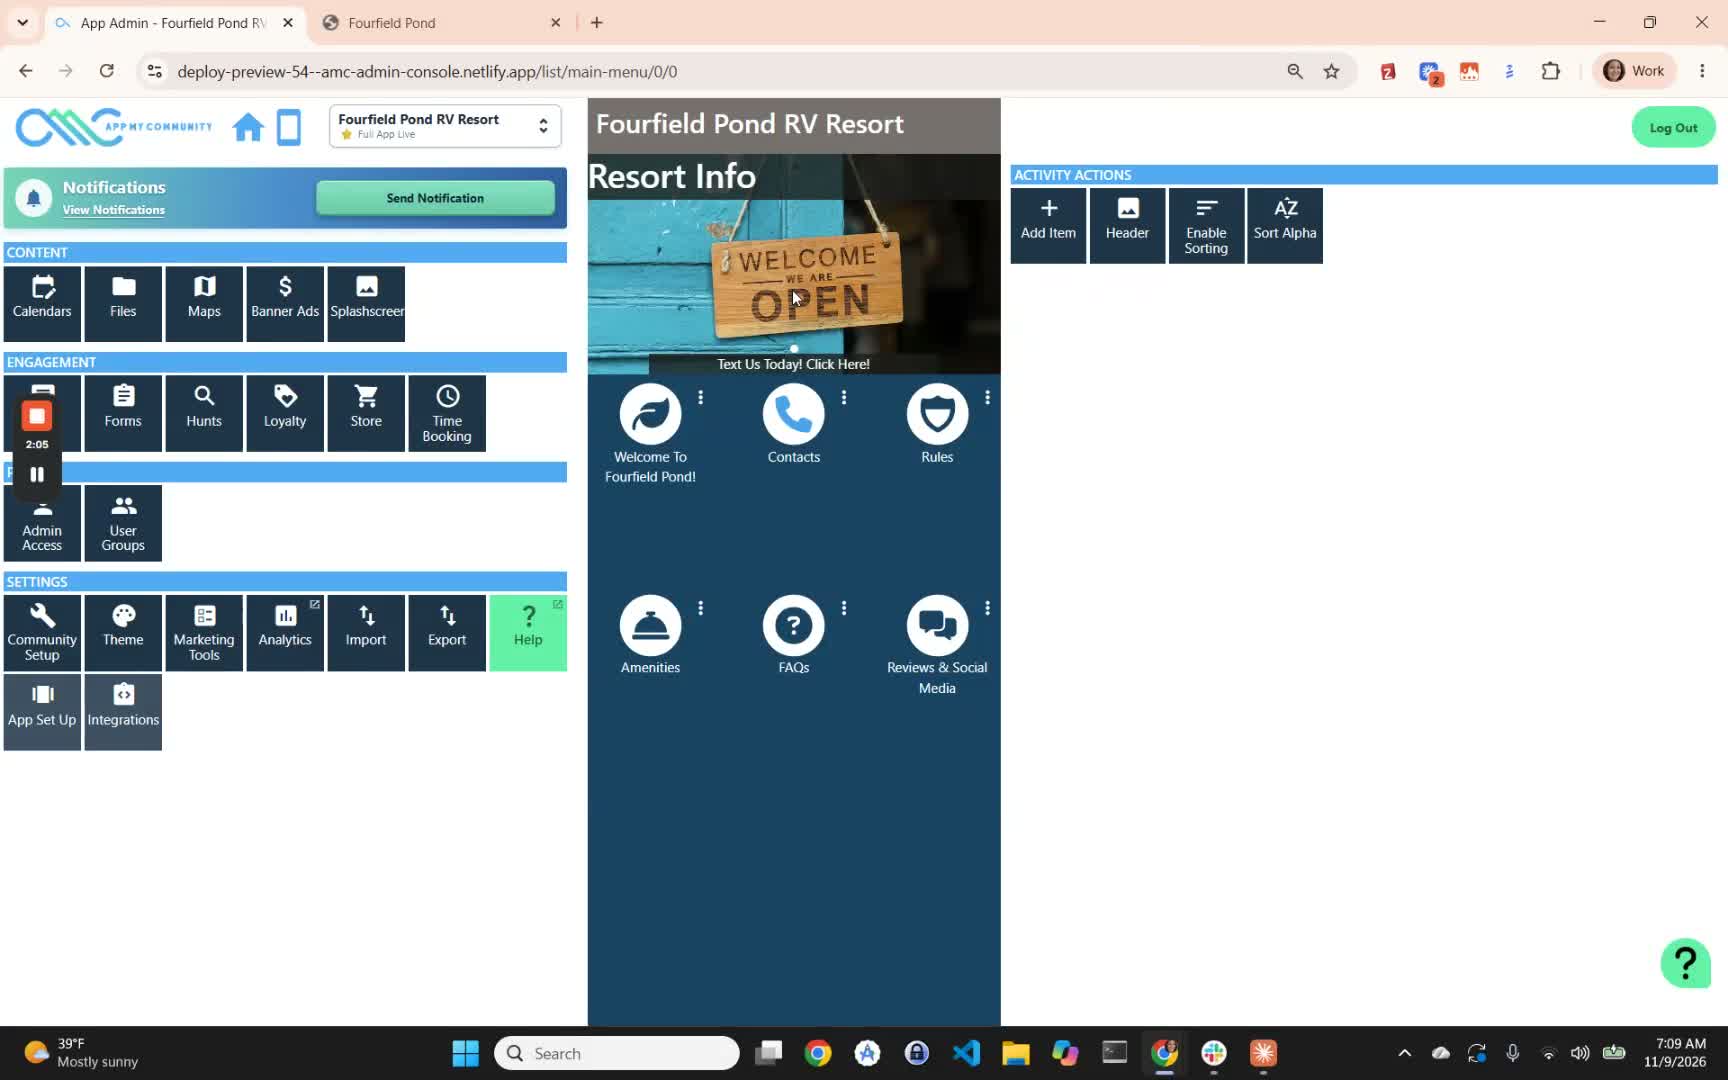
Click Enable Sorting to activate drag-and-drop reordering.
Drag items into the preferred order.
Click Save Order to lock in the new arrangement.
Use this method when you want a custom display order.
10. Sort Items Alphabetically 2:08
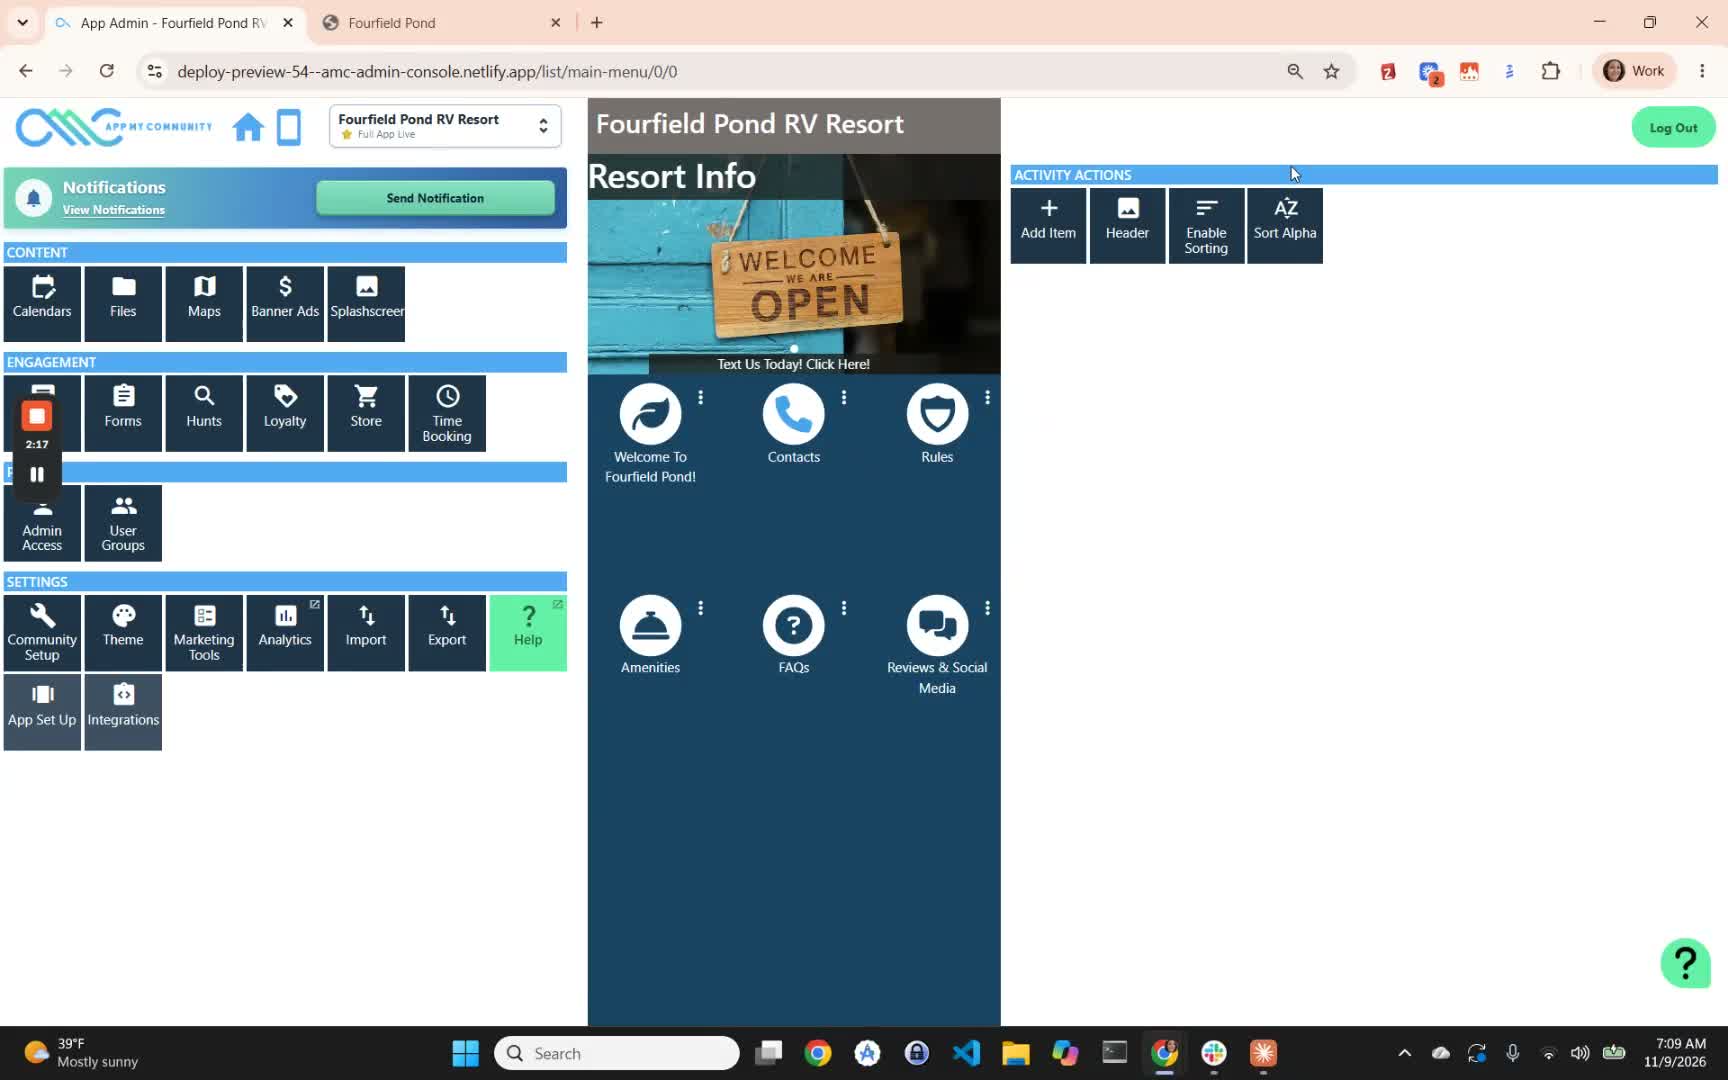
Choose Sort Alpha if you want items arranged alphabetically.
Click Sort to apply the alphabetical order.
Review the updated order to make sure it matches your expectations.
Use this option when consistency and quick organization are the priority.
11. Confirm the Left-to-Right Workflow 2:20
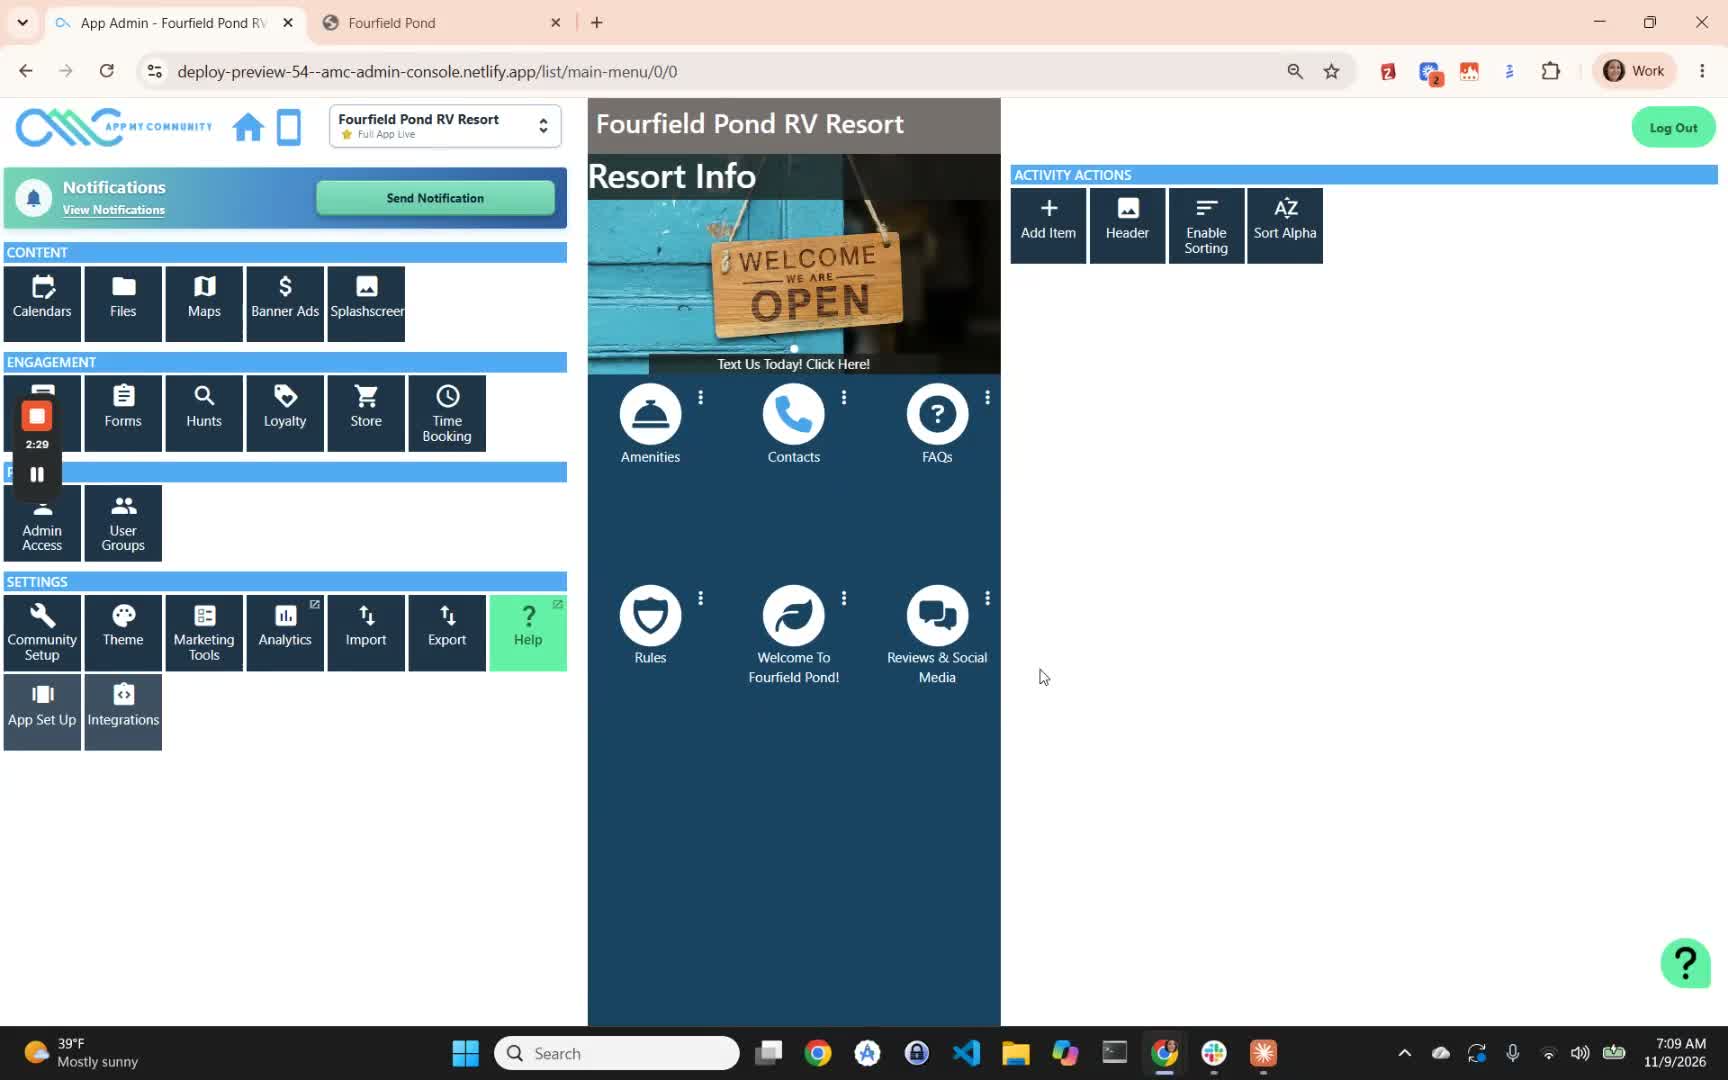
Follow the Admin Console flow from left to right:
Navigate using the left sidebar
Review the center preview
Complete actions in the right-hand panel
Use this structure to work efficiently and avoid missing steps.
Once familiar with the layout, begin making updates with confidence.
1. Identify the Main Navigation Areas 0:14
Use the left-hand sidebar as your primary navigation area.
Click the blue house icon at any time to return to the home screen.
Familiarize yourself with the main sections so you can move around the Admin Console quickly.
2. Access the Web App Preview 0:28
Click the phone icon to open your web app preview.
Use this view to see how changes appear live without needing to check directly on a mobile device.
Review updates here before finalizing them in the Admin Console.
3. Understand the Content and Engagement Sections 0:38
Review the Content area for items such as:
Documents
Calendars
Other informational content
Review the Engagement area for user interaction tools such as:
Custom forms
Scavenger hunts
Use these sections to manage what users see and how they interact with the app.
4. Manage Admins, User Groups, and Settings 0:52
Use the Admins area to manage admin access.
If user groups are enabled, use the available controls to manage those groups.
Check the Settings section for options available based on your permission level.
Only the buttons and tools allowed by your privileges will appear here.
5. Use Help Resources When Needed 1:09
Click the Help button to open the knowledge base.
Use the question mark icon in the bottom-right corner for support options.
From there, you can:
Read help articles
Submit a support ticket
Chat with the support team
Use these resources whenever you need clarification or troubleshooting assistance.
6. Review the App Preview in the Center Panel 1:28
Look at the center panel to see a preview of the app layout.
Use this preview to confirm how images, icons, and other elements appear to users.
Check rotating images and icon placement to verify the app’s visual structure.
7. Use the Right-Hand Panel for Next Steps 1:40
Refer to the right-hand side for context-sensitive next steps.
The options shown here will change depending on what section or item you select.
Use this panel to continue editing or configuring the selected area.
8. Edit Header Images and Add New Items 1:48
Select Resort Info or the relevant section you want to edit.
Update the header images as needed.
Click Add Item to create new icons or entries.
Confirm the changes are saved before moving on.
9. Reorder Items Manually 1:56
Click Enable Sorting to activate drag-and-drop reordering.
Drag items into the preferred order.
Click Save Order to lock in the new arrangement.
Use this method when you want a custom display order.
10. Sort Items Alphabetically 2:08
Choose Sort Alpha if you want items arranged alphabetically.
Click Sort to apply the alphabetical order.
Review the updated order to make sure it matches your expectations.
Use this option when consistency and quick organization are the priority.
11. Confirm the Left-to-Right Workflow 2:20
Follow the Admin Console flow from left to right:
Navigate using the left sidebar
Review the center preview
Complete actions in the right-hand panel
Use this structure to work efficiently and avoid missing steps.
Once familiar with the layout, begin making updates with confidence.